Push-Up Progression for Beginners: Wall to Floor
A practical beginner push-up progression from wall to floor, with rep targets, form checks, wrist options, and evidence-backed advancement rules.
Most people do not fail push-ups because they are lazy. They fail because the jump from “hands on a wall” to “hands on the floor” is too big.
A floor push-up is not a beginner exercise for everyone. It asks the chest, shoulders, triceps, trunk, wrists, and breathing pattern to cooperate under a meaningful share of bodyweight. If one of those pieces is not ready, the body finds shortcuts: hips sag, elbows flare, shoulders shrug, range disappears, and the rep technically happens without teaching the movement you wanted.
A better push-up progression works like a staircase. Start high. Lower the surface gradually. Keep the same body line, range, tempo, and breathing at each step. When the current level becomes repeatable, move down one level. That is the whole system.
This guide is deliberately narrow. It is not a complete upper-body program and it is not an advanced calisthenics map. For broader programming, use progressive overload at home and upper body without weights. Here, the target is simpler: build your first clean floor push-up from wall to floor without guessing.
The progression order
Evidence used in this section: American College of Sports Medicine position stand. Quantity and quality of exercise for developing and maintaining cardiorespiratory, musculoskeletal, and neuromotor fitness in apparently healthy adults: guidance for prescribing exercise and Effect of Progressive Calisthenic Push-up Training on Muscle Strength and Thickness; The effect of position on the percentage of body mass supported during traditional and modified push-up variants.
Use this order:
- Wall push-up
- High-counter push-up
- Low-counter or table push-up
- Chair, bench, or sofa-arm incline push-up
- Knee push-up or negative floor push-up
- Full floor push-up
The reason this works is leverage. Raising your hands shifts more bodyweight through the feet and less through the arms. Lowering the hands shifts load back toward the upper body. Suprak, Dawes, and Stephenson studied how body position changes the percentage of body mass supported during push-up variants (PMID 20179649). Their practical message is exactly what beginners need: position changes are load changes.
That matters because “do more push-ups” is not a progression if the version is already too hard. You need a version that lands in the trainable zone: challenging enough that the last few reps require effort, easy enough that the reps still look like push-ups.
Aim for 3 sets of 6 to 10 reps at each level. When you can complete 3 sets of 10 with the same range and body line for two sessions in a row, lower your hands one step. If the next level drops you to 3 sets of 4 or changes your form, go back up and use a slower tempo for one more week.
That is not regression. That is honest loading.
Level 1: wall push-ups
Evidence used in this section: Effect of Progressive Calisthenic Push-up Training on Muscle Strength and Thickness and The effect of position on the percentage of body mass supported during traditional and modified push-up variants.
Stand facing a wall with hands around chest height. Step back until your body leans forward slightly. Keep ribs down, glutes lightly engaged, and body long from head to heels. Bend the elbows and bring your chest toward the wall, then press the wall away.
Start here if floor push-ups feel impossible, if your shoulders shrug immediately, or if you are returning after a long break. Wall push-ups are also useful for learning the plank-like body line without asking the wrists and shoulders to handle floor-level loading on day one.
Use this dose:
| Week | Sets and reps | Tempo | Advancement target |
|---|---|---|---|
| 1 | 2 x 8 | Easy, controlled | No shoulder shrugging |
| 2 | 3 x 8 | 2 seconds down, 1 up | Same chest distance each rep |
| 3 | 3 x 10 | 3 seconds down, 1 up | Ready for high counter |
The most common wall mistake is standing too close. If the movement feels like a gentle arm bend, step the feet farther back. You should feel the chest, front shoulders, triceps, and trunk working together.
Use one external cue: push the wall away until your upper back is broad. Wulf and colleagues’ motor-learning research supports external-focus feedback for learning movement form (PMID 21833250). In practice, a cue like “push the wall away” is usually cleaner than thinking about five body parts at once.
Level 2: high-counter push-ups
Evidence used in this section: The effect of position on the percentage of body mass supported during traditional and modified push-up variants and Comparison of muscle activation using various hand positions during the push-up exercise.
Move from the wall to a sturdy countertop, desk, or rail around waist to lower-chest height. Place hands shoulder-width apart. Walk the feet back until the body forms one line. Lower the sternum toward the edge, pause briefly, then press away.
This is where the movement starts to feel like a real push-up. The body angle is lower, the arms support more load, and the trunk has to resist sagging. The goal is to keep the wall-push-up shape while changing only the angle.
Use 3 sets of 6 to 10 reps. Rest 60 to 90 seconds. Stop each set with 1 or 2 good reps left instead of grinding until the line breaks.
Check these three things:
- Your chest moves toward the same target each rep.
- Your hips do not arrive before your shoulders on the way up.
- Your elbows angle roughly 30 to 60 degrees from the torso, not straight out to the sides.
Cogley and colleagues showed that hand position changes pectoralis major and triceps activation during push-ups (PMID 16095413). Beginners do not need to chase special hand positions yet. Use shoulder-width hands first. It gives you a repeatable baseline before narrow, diamond, or decline variations become useful.
Level 3: low-counter or table push-ups
Evidence used in this section: Comparison of muscle activation using various hand positions during the push-up exercise and Effects of range of motion on muscle development during resistance training interventions: A systematic review.
Lower the surface again: a heavy table, stable kitchen island edge, or solid desk works well. Do not use anything that slides, flexes, tips, or has wheels. Test the surface before loading it.
At this level, the push-up starts exposing trunk control. If the hips sag, the arms may still be strong enough but the body line is not. Think of the exercise as a moving plank with a press attached.
Use this simple form check:
| Checkpoint | Good sign | Modify if |
|---|---|---|
| Range | Chest reaches the same depth | Reps get shorter after rep 5 |
| Body line | Head, ribs, hips, and heels move together | Hips drop or pike upward |
| Shoulders | Shoulders stay away from ears | Neck tightens and elbows flare |
| Breath | Inhale down, exhale as you press | Breath disappears before the set ends |
Range matters because it is a training variable, not just a style preference. Schoenfeld and Grgic’s systematic review on range of motion in resistance training (PMID 32030125) found limited but useful evidence that fuller ranges can favor hypertrophy outcomes, especially in lower-body studies, while upper-body evidence was less conclusive. The practical takeaway for beginners is modest: pick a comfortable range and keep it consistent. Do not count a shorter rep as the same rep.
If 3 sets of 10 are clean here, you are usually ready for a chair or bench incline.
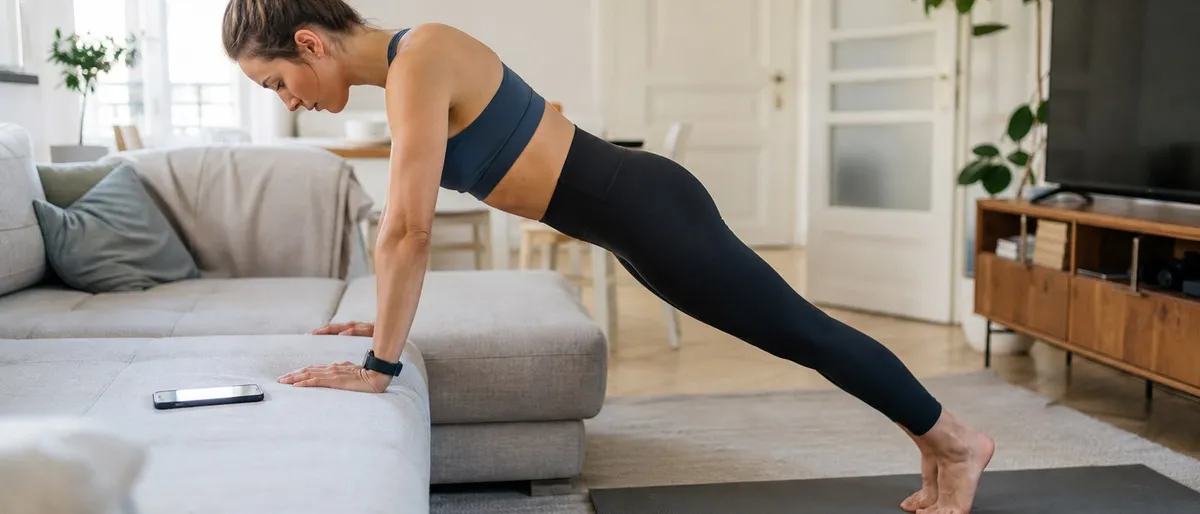
Level 4: chair, bench, or sofa-arm incline push-ups
Evidence used in this section: Effects of range of motion on muscle development during resistance training interventions: A systematic review and Frequent external-focus feedback enhances motor learning.
This is the last major step before the floor. Hands go on a stable chair, bench, sofa arm, low table, or step. The surface should be low enough that the movement is clearly harder than the countertop version, but not so low that you collapse into the bottom.
The best incline height is the one that lets you perform sets of 6 to 8 clean reps. If the first rep already feels like a max attempt, the surface is too low. If 15 reps are easy, it is too high or the tempo is too fast.
Use this progression:
| Session goal | Prescription |
|---|---|
| Strength base | 3 x 6-8 incline push-ups |
| Control week | 3 x 6 with a 3-second lowering phase |
| Volume target | 3 x 10 normal tempo |
| Advancement test | 2 sets of 8 plus 3 controlled floor negatives |
Kotarsky and colleagues tested progressive calisthenic push-up training against traditional bench press training and found that systematic push-up progression improved strength and muscle thickness in early-stage participants (PMID 29466268). The important word is systematic. You are not proving toughness by rushing to the floor. You are giving the body a clear loading path.
Pair this with the home workout form check once per week. Film 5 reps from the side. If the body line looks the same at reps 1 and 5, the level is probably correct.
Level 5: knee push-ups or negative floor push-ups
Evidence used in this section: Frequent external-focus feedback enhances motor learning and Physical Activity Guidelines for Americans, 2nd edition.
The floor transition is where beginners get stuck. Two options help bridge the gap:
Knee push-ups reduce the lever length. Start from hands and knees, then walk the knees back until shoulders, hips, and knees make a straight line. Lower the chest toward the floor and press back up. Do not hinge at the hips.
Negative floor push-ups train the hardest part first. Start in a full plank. Lower slowly for 3 to 5 seconds until the chest reaches the floor or your clean range ends. Put knees down, reset, and return to the top. Each rep is a controlled descent, not a failed push-up.
Choose based on what fails:
| If this fails | Use |
|---|---|
| You cannot press up from the bottom | Knee push-ups |
| You collapse on the way down | Negative floor push-ups |
| Your wrists object to floor pressure | Incline push-ups or neutral-grip handles |
| Your hips sag immediately | More incline work plus planks |
For wrist sensitivity, use the wrist-friendly home workout guide before forcing flat-palmed floor reps. The goal is pressing strength, not proving that one wrist angle suits everyone.
Stay in this bridge phase until you can perform either 3 sets of 8 knee push-ups with a straight line from shoulders to knees, or 3 sets of 5 slow negatives without collapsing. Then test full floor push-ups.
Level 6: full floor push-ups
Evidence used in this section: Physical Activity Guidelines for Americans, 2nd edition and American College of Sports Medicine position stand. Quantity and quality of exercise for developing and maintaining cardiorespiratory, musculoskeletal, and neuromotor fitness in apparently healthy adults: guidance for prescribing exercise.
Set up with hands slightly wider than shoulders, fingers forward or slightly turned out, feet hip-width apart. Brace lightly as if holding a plank. Lower until the chest approaches the floor or reaches your consistent pain-free range. Press the floor away until elbows straighten without locking aggressively.
Your first floor push-up should not be a surprise miracle rep. It should feel like the next step down from a clean incline and negative progression.
Use this first-floor template:
| Day | Work |
|---|---|
| Day 1 | 5 singles, resting 60-90 seconds between reps |
| Day 2 | 3 sets of 2-3 reps, then 2 sets of incline push-ups |
| Day 3 | 3 sets of 3-5 reps |
| Day 4 | 3 sets of 5, then lower-incline back-off set |
Do not chase a max set immediately. The Physical Activity Guidelines for Americans recommend muscle-strengthening activity involving major muscle groups at least two days per week. They do not require beginners to test failure every session. In fact, ACSM guidance emphasizes gradual progression and individual response (PMID 21694556), which is the better frame for building a movement you want to keep.
Once you can perform 3 sets of 8 floor push-ups with clean form, you can decide what “next” means. More reps build endurance. Slower tempo builds control. Narrow-grip push-ups shift demand toward the triceps. Feet-elevated push-ups increase upper-body load. The calisthenics progression system maps those branches in detail.
The weekly plan
Evidence used in this section: American College of Sports Medicine position stand. Quantity and quality of exercise for developing and maintaining cardiorespiratory, musculoskeletal, and neuromotor fitness in apparently healthy adults: guidance for prescribing exercise and Effect of Progressive Calisthenic Push-up Training on Muscle Strength and Thickness.
Train push-ups 2 or 3 days per week. Leave at least one rest day between harder sessions.
| Week | Main level | Work sets | Assistance |
|---|---|---|---|
| 1 | Wall | 3 x 8 | 2 x 20-second high plank against wall |
| 2 | High counter | 3 x 6-8 | 2 x 8 wall push-ups with slow tempo |
| 3 | Low counter or table | 3 x 6-10 | 2 x 20-second incline plank |
| 4 | Chair or bench incline | 3 x 6-8 | 2 x 5 slow negatives from the same surface |
| 5 | Knee or floor negative | 3 x 5-8 | 2 x 6 incline push-ups |
| 6 | Floor singles to small sets | 5 singles or 3 x 2-5 | 1-2 incline back-off sets |
This is a template, not a deadline. If week 3 needs to last three weeks, let it. The body does not care whether the calendar says “week 4.” It cares whether the current stimulus is tolerable, repeatable, and progressive.
Use a deload if elbows, wrists, or shoulders feel unusually irritated, or if performance drops for two sessions in a row. A deload can be as simple as moving one surface higher and cutting sets from 3 to 2 for one week.
Mistakes that stall the wall-to-floor path
Evidence used in this section: Effect of Progressive Calisthenic Push-up Training on Muscle Strength and Thickness and The effect of position on the percentage of body mass supported during traditional and modified push-up variants.
Skipping heights. Going from a wall straight to the floor is like going from an empty barbell to a heavy bench press. Use more steps: wall, high counter, low counter, chair, floor.
Counting partial reps as full progress. A shorter range can be useful when deliberate, but it should not sneak into the set unnoticed. If range changes, log it honestly.
Letting the hips lead. If the chest stays high while the hips drop, the set has become a low-back exercise. Raise the hands and rebuild the body line.
Training push-ups every day near failure. Beginners often need practice frequency, but tissues still need recovery. Two or three quality sessions beat seven irritated ones.
Changing hand position too soon. Diamond, wide, and decline push-ups are useful later. First earn a stable shoulder-width version.
Ignoring the surface. A shaky chair makes the nervous system guard the movement. Use stable furniture so the target muscles can actually train.
The boring version is the effective version: same setup, same target, same tempo, same log. Then one small change.
How RazFit can fit
Evidence used in this section: The effect of position on the percentage of body mass supported during traditional and modified push-up variants and Comparison of muscle activation using various hand positions during the push-up exercise.
RazFit’s strength trainer, Orion, is useful here because beginner push-up progress is rarely linear. Some weeks the right move is lowering the incline. Other weeks it is keeping the same height and adding a slower descent, one rep, or one extra set. Tracking that manually is possible, but easy to forget.
Use the app as a decision helper, not as a race. Log the version you can control today. Let the progression earn its way down to the floor. Lyssa can handle short cardio sessions on non-push days so your upper body gets recovery while the habit stays alive.
The first full push-up is satisfying, but the real win is cleaner than that: you built a repeatable way to make hard things easier to learn.
References
-
Garber, C.E., Blissmer, B., Deschenes, M.R., et al. (2011). “American College of Sports Medicine position stand. Quantity and quality of exercise for developing and maintaining cardiorespiratory, musculoskeletal, and neuromotor fitness in apparently healthy adults: guidance for prescribing exercise.” Medicine & Science in Sports & Exercise, 43(7), 1334-1359. PMID 21694556. DOI: 10.1249/MSS.0b013e318213fefb.
-
Kotarsky, C.J., Christensen, B.K., Miller, J.S., & Hackney, K.J. (2018). “Effect of Progressive Calisthenic Push-up Training on Muscle Strength and Thickness.” Journal of Strength and Conditioning Research, 32(3), 651-659. PMID 29466268. DOI: 10.1519/JSC.0000000000002345.
-
Suprak, D.N., Dawes, J., & Stephenson, M. (2011). “The effect of position on the percentage of body mass supported during traditional and modified push-up variants.” Journal of Strength and Conditioning Research, 25(2), 497-503. PMID 20179649. DOI: 10.1519/JSC.0b013e3181bde2cf.
-
Cogley, R.M., Archambault, T.A., Fibeger, J.F., Koverman, M.M., Youdas, J.W., & Hollman, J.H. (2005). “Comparison of muscle activation using various hand positions during the push-up exercise.” Journal of Strength and Conditioning Research, 19(3), 628-633. PMID 16095413.
-
Schoenfeld, B.J., & Grgic, J. (2020). “Effects of range of motion on muscle development during resistance training interventions: A systematic review.” SAGE Open Medicine, 8, 2050312120901559. PMID 32030125. PMCID PMC6977096. DOI: 10.1177/2050312120901559.
-
Wulf, G., Chiviacowsky, S., Schiller, E., & Avila, L.T.G. (2010). “Frequent external-focus feedback enhances motor learning.” Frontiers in Psychology, 1, 190. PMID 21833250. PMCID PMC3153799. DOI: 10.3389/fpsyg.2010.00190.
-
U.S. Department of Health and Human Services. (2018). Physical Activity Guidelines for Americans, 2nd edition. https://odphp.health.gov/our-work/nutrition-physical-activity/physical-activity-guidelines/current-guidelines